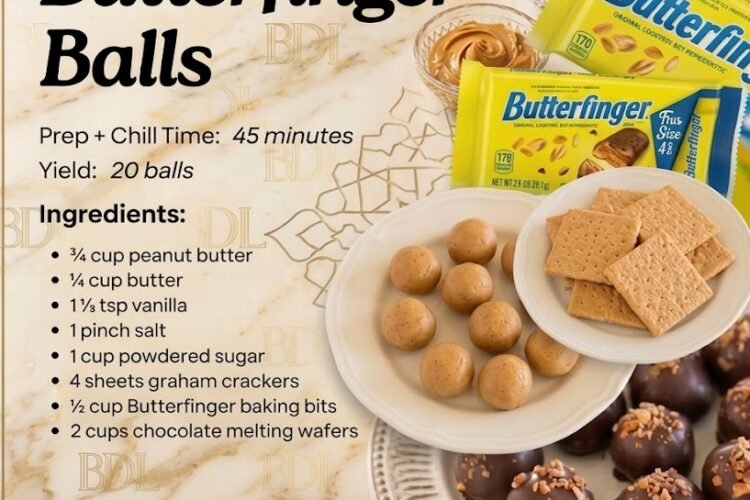
If you’re looking for an easy no-bake dessert that tastes just like a gourmet candy shop treat, these No-Bake Butterfinger Balls are the perfect recipe. Made with creamy peanut butter, crushed graham crackers, Butterfinger candy pieces, and a rich chocolate coating, these bite-sized treats are packed with sweet, crunchy flavor.
They’re perfect for holiday cookie trays, parties, edible gifts, game days, or whenever you’re craving a homemade candy bar experience. Best of all, there’s no oven required.
Why You’ll Love This Recipe
- No baking required
- Ready in under an hour
- Rich chocolate and peanut butter flavor
- Perfect for parties and holidays
- Easy to make ahead
- Freezer-friendly
Preparation Time
- Prep Time: 20 minutes
- Chill Time: 25 minutes
- Total Time: 45 minutes
Yield
Makes approximately 20 Butterfinger Balls
Difficulty Level
Easy
Ingredients
For the Peanut Butter Filling
- ¾ cup creamy peanut butter
- ¼ cup unsalted butter, softened
- 1½ teaspoons vanilla extract
- 1 pinch salt
- 1 cup powdered sugar
- 4 sheets graham crackers, finely crushed
- ½ cup Butterfinger baking bits or crushed Butterfinger candy bars
For the Chocolate Coating
- 2 cups chocolate melting wafers
Optional Garnish
- Extra crushed Butterfinger candy
- Chocolate drizzle
- Crushed peanuts
Equipment Needed
- Large mixing bowl
- Electric mixer or wooden spoon
- Baking sheet or tray
- Parchment paper
- Microwave-safe bowl
- Fork or dipping tool
Step-by-Step Instructions
Step 1: Prepare the Graham Cracker Crumbs
Place the graham crackers in a food processor and pulse until they become fine crumbs.
If you don’t have a food processor, place them in a zip-top bag and crush them with a rolling pin.
Set aside.
Step 2: Make the Peanut Butter Mixture
In a large mixing bowl, combine:
- Peanut butter
- Softened butter
- Vanilla extract
- Salt
Using a hand mixer or spoon, mix until smooth and creamy.
The mixture should be completely combined with no visible lumps.
Step 3: Add the Dry Ingredients
Gradually add the powdered sugar while mixing.
Next, add the crushed graham cracker crumbs.
Mix until a thick dough-like consistency forms.
Step 4: Add the Butterfinger Pieces
Fold the Butterfinger baking bits into the mixture.
Stir until evenly distributed throughout the filling.
Every bite should contain plenty of crunchy candy pieces.
Step 5: Shape the Balls
Line a tray or baking sheet with parchment paper.
Using a small cookie scoop or tablespoon, portion the mixture into equal-sized pieces.
Roll each portion between your palms to form smooth balls.
Place them on the prepared tray.
You should have approximately 20 candy balls.
Step 6: Chill
Transfer the tray to the refrigerator.
Chill for 20–25 minutes.
This step helps the balls firm up and makes dipping easier.
Step 7: Melt the Chocolate
Place the chocolate melting wafers in a microwave-safe bowl.
Microwave in 30-second intervals, stirring after each interval.
Continue until the chocolate is completely melted and smooth.
Allow it to cool slightly before dipping.
Step 8: Coat the Candy Balls
Using a fork or dipping tool, lower each chilled ball into the melted chocolate.
Roll gently until completely coated.
Lift out and allow excess chocolate to drip off.
Return each coated ball to the parchment-lined tray.
Step 9: Add Garnish
Before the chocolate sets, sprinkle the tops with:
- Crushed Butterfinger candy
- Crushed peanuts
- Chocolate shavings
This adds texture and creates a professional bakery-style appearance.
Step 10: Final Chill
Place the tray back into the refrigerator.
Chill for 15–20 minutes or until the chocolate coating is completely set.
Expert Tips for Perfect Butterfinger Balls
Use Room Temperature Butter
Softened butter blends more easily and creates a smoother filling.
Don’t Skip the Chilling Step
Cold candy centers are much easier to dip into melted chocolate.
Use High-Quality Chocolate
Good-quality melting chocolate creates a shinier, smoother coating.
Work Quickly
Chocolate sets fast, so add garnishes immediately after dipping.
Flavor Variations
Double Chocolate Butterfinger Balls
Mix 2 tablespoons cocoa powder into the filling.
Peanut Lover’s Version
Add ¼ cup finely chopped roasted peanuts.
White Chocolate Butterfinger Balls
Replace milk chocolate with white chocolate melting wafers.
Cookies and Candy Version
Mix in crushed chocolate sandwich cookies for extra crunch.
Storage Instructions
Refrigerator
Store in an airtight container for up to 1 week.
Freezer
Freeze in a sealed container for up to 3 months.
Allow to thaw for 15 minutes before serving.
Frequently Asked Questions
Can I use crunchy peanut butter?
Yes. Crunchy peanut butter adds additional texture and flavor.
Can I use regular chocolate chips?
Yes, but adding 1 teaspoon of coconut oil can help create a smoother coating.
Can I make them ahead of time?
Absolutely. These treats are ideal for preparing several days in advance.
Do they need refrigeration?
Yes. Refrigeration helps maintain their shape and keeps the chocolate coating firm.
Serving Suggestions
These No-Bake Butterfinger Balls are perfect for:
- Holiday dessert platters
- Christmas cookie exchanges
- Birthday parties
- Game day snacks
- Homemade edible gifts
- Family gatherings
Serve chilled or slightly softened for the ultimate candy-bar-inspired dessert experience.
Final Thoughts
These No-Bake Butterfinger Balls combine everything people love about candy bars—creamy peanut butter, crunchy Butterfinger pieces, and rich chocolate coating—into one irresistible bite-sized treat. Easy to make, impossible to resist, and guaranteed to disappear fast, they’re a must-try recipe for every dessert lover.